Behold, the black walnut tree:
Our backyard is bordered with these trees. They are magical! Here’s why:
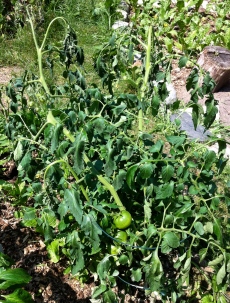
 1. Magical Plant-Ruining Toxins! This explains why my tomatoes wilted. It turns out that the tree (especially its roots, nut hulls and flower buds) contain a chemical called juglone which can cause many plants (such as asparagus, cabbage, eggplant, peppers, potatoes, rhubarb and tomatoes) to stunt, turn yellow and wilt. Plants affected by its toxicity (usually within 50-80 feet of the tree, and especially under its drip line) will struggle to live and may even die. The symptoms are very often confused with fungal or bacterial wilt. Well, that explains A LOT. Apparently, even if you chop the trees down, the toxins remain in the soil for several years. If this problem affects you, there is a list of juglone-resistant vegetables at Wisconsin Horticulture.
2. Magical, Skin-Dyeing Properties! The flesh of the hull is a powerful dye, used historically to colour products like cotton and basket materials. It’s also caustic. If you’re going to handle these nuts, wear clothes you don’t care about and a pair of protective gloves. And make sure said pair of protective gloves does not have a tiny hole in the thumb, or else your hands will look like mine, to the left, for A LONG TIME. Nothing gets it out. My friends call it my “Haunted Thumb”.
 3. Magical, Edible Nuts Inside! Walnut trees produce nuts inside green, spherical hulls that you’ll likely recognize if you’re North American. With some work, they’re edible but be warned: the taste may surprise you. Amy Crowell of Edible Austin writes: “It tastes nothing like the common English walnut; it’s much more aromatic and tastes like an expensive perfume… author Samuel Thayer once likened it to really good paint”. Black walnuts are not snacking food; rather, a delicacy that you can add to treats such as home-made ice cream and cookies.
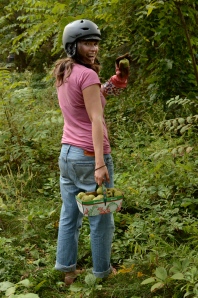
Most folks leave these things to the squirrels. But, as you can see by my thumb, I decided to harvest some of my own to make my ruined tomatoes worthwhile. Here’s how it went:
 Collect the nuts that have fallen from the tree when they are soft enough that you can press in the skin with your thumb and leave a dent. They should be greenish-yellowy and will likely have black spots. (I am wearing the helmet because I am scared a walnut will fall on my head. I am a Registered Nurse and live in constant, unreasonable fear of life-altering brain injury).
- Getting the nuts out of the hull was an ordeal… until I found a true Gardening for Chumps solution: run over them with your car. (But beware of rogue nuts that fly out from under the tire!). Simply pluck the nut out once the hull is crushed. You may notice some tiny
 Hull Fly larvae in the flesh. They are a bit gross but don’t affect the actual nutmeat so don’t worry about them.
 - Pour the walnuts into a big bucket or a laundry sink, cover with water and stir them around with a stick so that the walnuts rub against each- this will remove more of the hull remnants. You won’t get it all off, but it will make your job
 less messy later.
 - Lay the nuts out to dry in a warm place for a day (in the sun, if possible), somewhere where you don’t mind a possible stain.
- Hang the dried walnuts in an onion sack for 2 weeks to cure.
- (And this is the hard part): crack open the nuts to get the nutmeat out. This video provides an informative review of black walnut harvesting, with a great explanation of this step starting at 5:10. I like this video, plus there is something warm and jolly about the host- he’s kind of like a Young Santa:
- Once you’ve removed the nutmeat, do a quick visual inspection to make sure there are no remaining shell pieces hiding in there, just waiting to ruin your cavities if accidentally added to your banana loaf.
DO’s and DON’Ts:
DO: Wear protective gloves and old clothes when handling hulls.
DON’T: Work with hulls/wet walnuts over surfaces you’re precious about.
DO: Compost leftover hulls. Surprisingly, a three-year study quashed the popular belief that, because of the juglone, hulls shouldn’t be composted. It turns out that well-decomposed hulls are the “black gold” of compost, with alkaline pH. After 6 months, the harmful chemical breaks down- but I wouldn’t try this if your compost isn’t well maintained.
DON’T: Pour the leftover water from nut-washing onto your lawn. It kills the worms below.
DO: Wear protective gloves. It bears repeating.
DON’T: Leave your walnuts out where squirrels can get at them. Little devils.
DO: Store in the freezer: walnuts, both in and out of shells, can be kept this way for up to 2 years. (This is particularly handy, as most walnut trees only produce nuts in abundance every other year).
DON’T: Expect your black walnuts to taste like your usual snacking-walnut. Remember: expensive paint.
Happy harvesting!


